A Guide to Taking Better Self-Portraits on Vacation


Disclaimer: McMillans Meet World is a participant in the Amazon Services LLC Associates Program, an affiliate advertising program designed to provide a means for sites to earn advertising fees by advertising and linking to Amazon.com. This post contains affiliate links, which means we may receive a small commission from clicks and/or purchases made through affiliate links on our website.
In this post, we will cover how to take the best self-portraits using a DSLR camera. We use a Canon 5D Mark IV and have found the process to be similar across other DSLR cameras. In order to capture the perfect self-portrait, you will need:
–A DSLR camera
–A tripod
–If shooting Canon, the free Canon Camera Connect App
While you can use a smartphone to take self-portraits as well, we prefer a DSLR for the quality of images produced. A tripod isn’t always necessary either, but we’ve been frustrated too may times by crooked images and the risk of something happening to our camera as it’s balanced precariously on an object in nature to go without one. We use this one from Amazon which has a built in level to ensure each photo is straight.
While the tripod’s camera attachment is able to swivel for portrait style photos, we also use this portrait attachment , as it keeps the camera more secure.
Read More: Our Favorite Camera Gear for Travel
I try not to think of the trips we’ve taken without a tripod, taking pictures individually or having to awkwardly ask a stranger to take a photo. Oh the pictures we could have had on our honeymoon in Key West, our Christmas trip to New York…Avalanche Lake in Glacier National Park. We forgot a small piece of our tripod that attaches the camera and missed out on a picture together after our hike, so now we triple check our gear to make sure we have everything. As much as we appreciate kind people who offer to take a picture of us together, it’s almost always out of focus. For example…

After learning how to take self-portraits, we’ve been able to capture some of our favorite pictures together in locations like Saguaro National Park, the Bonneville Salt Flats, and Cannon Beach. While the process took a few tries to get the hang of, we can proudly say that we’re able to set up our tripod, get our camera ready, and begin shooting in under a minute.
The Process
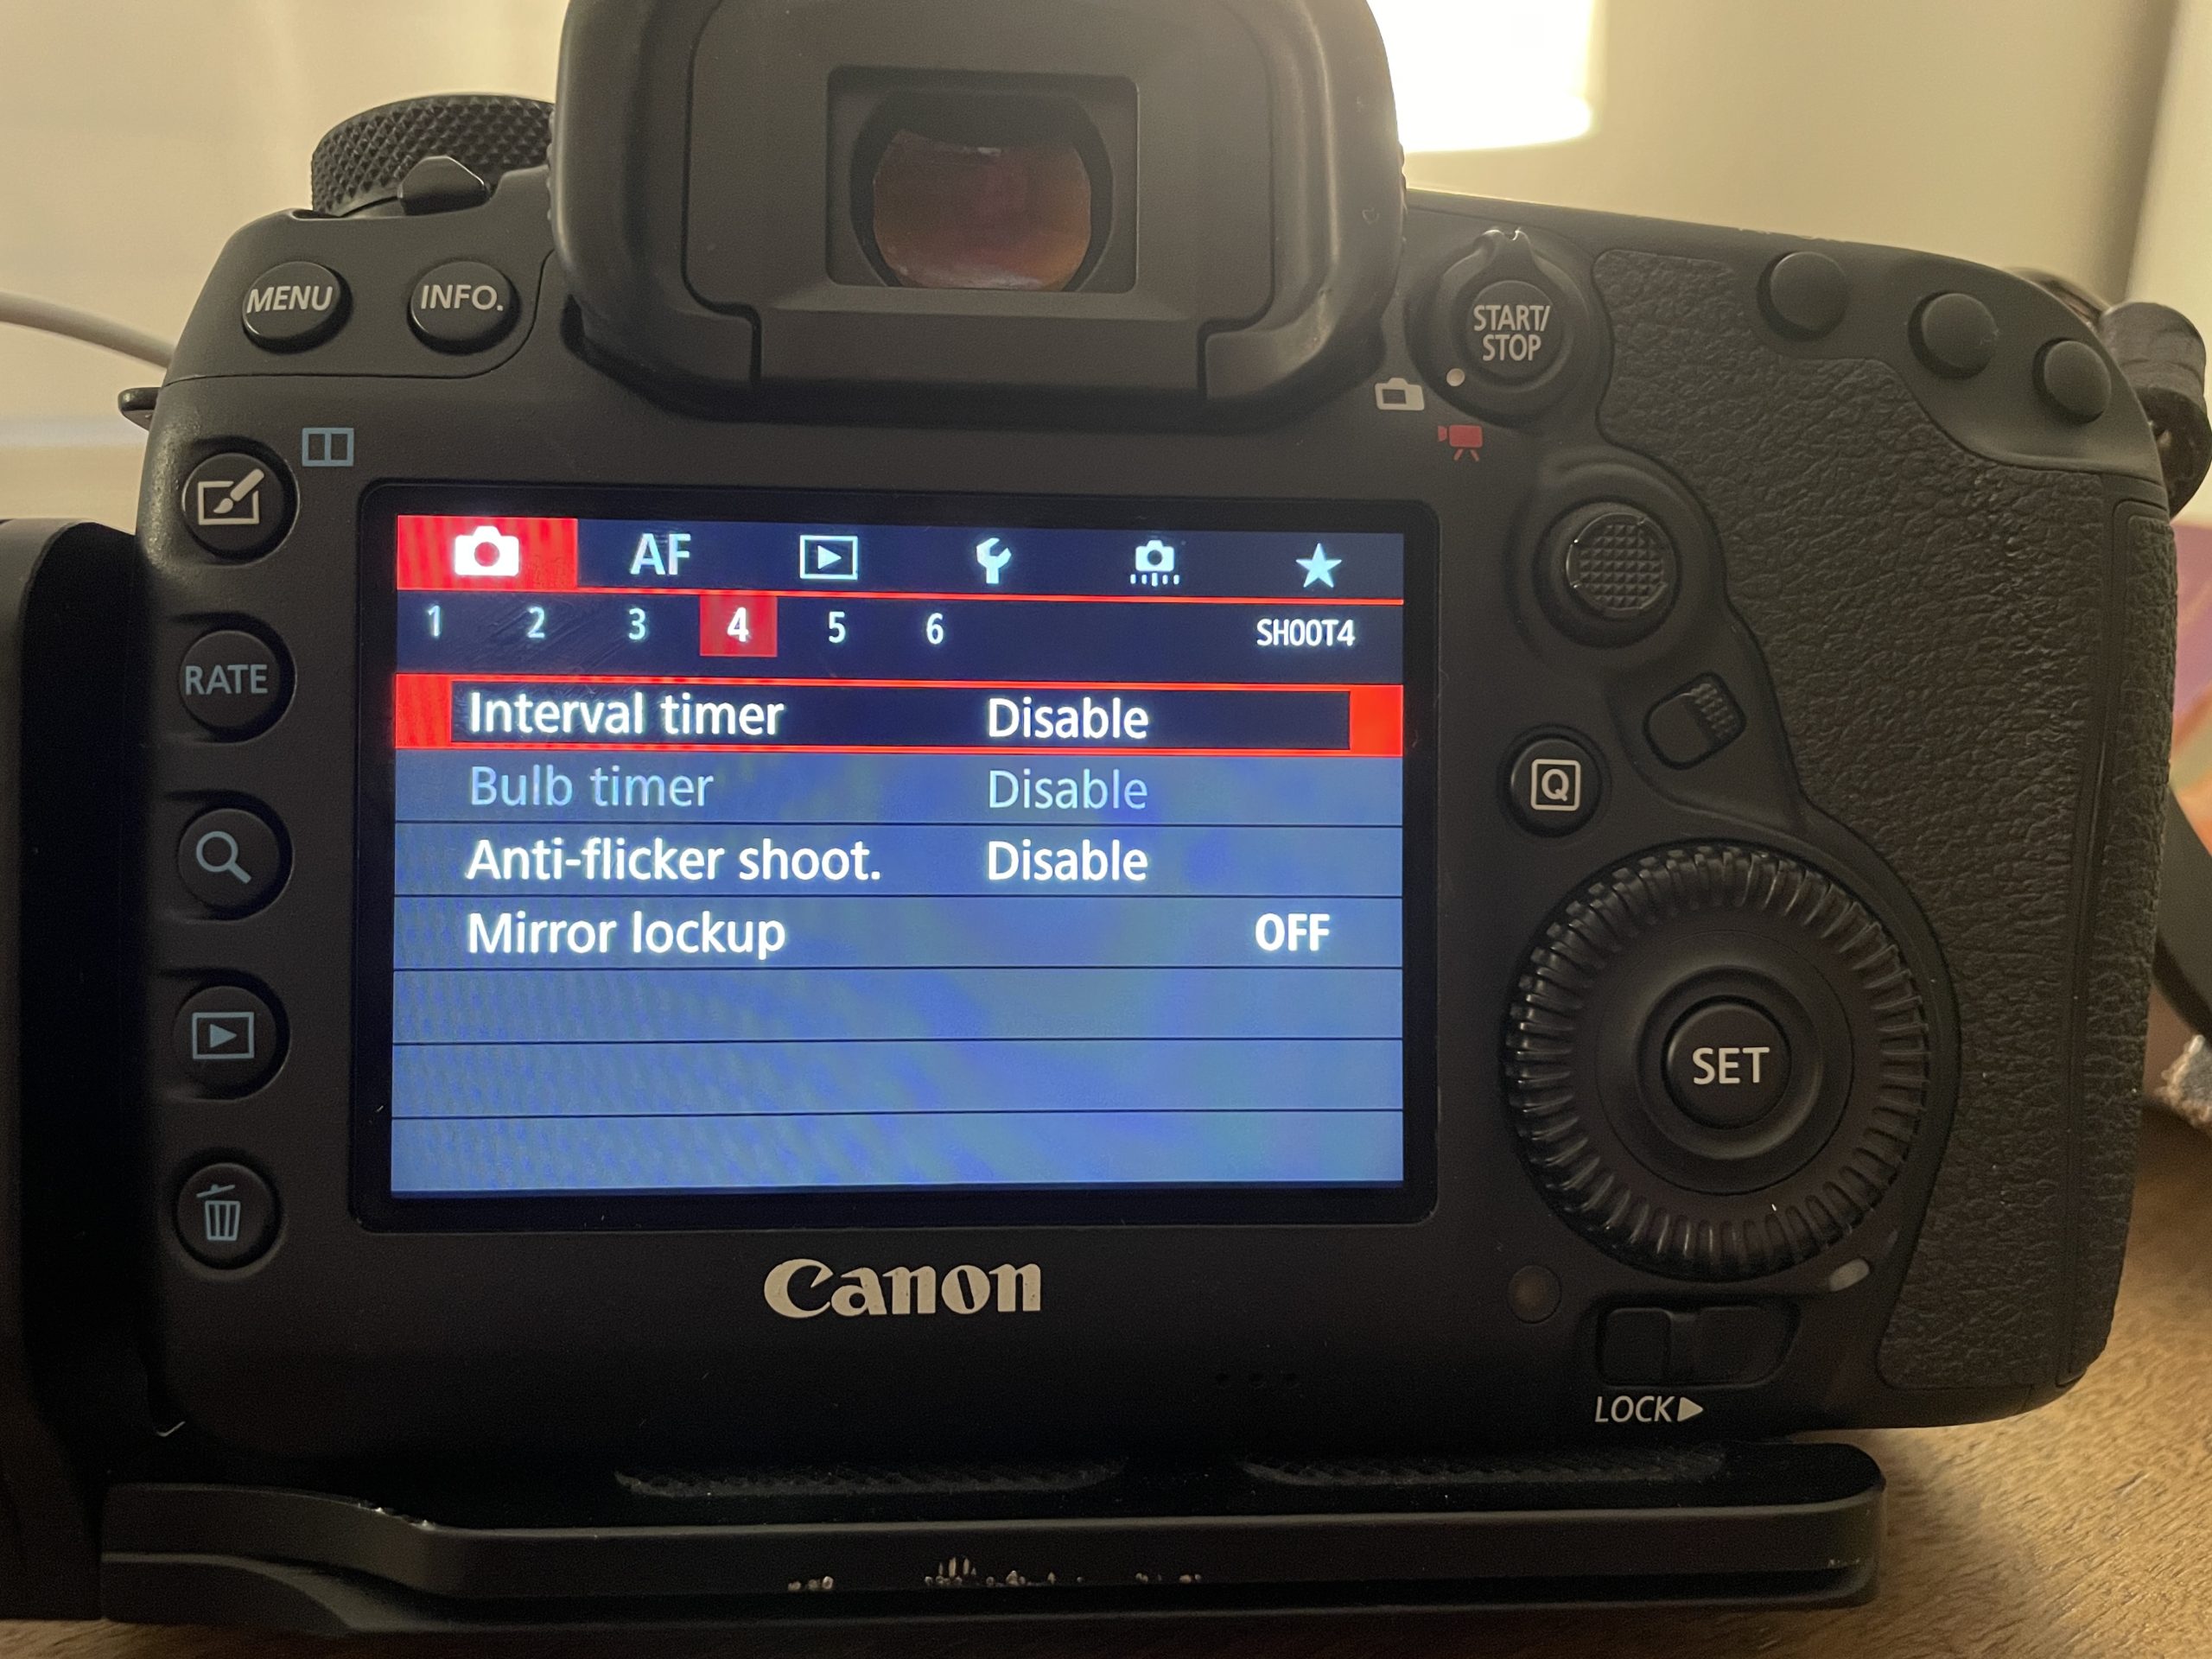
Once your tripod is set up and level (or as level as possible depending on your shooting location), and your camera’s exposure settings are selected, it’s time to set your camera’s interval timer. Most Canon cameras and DSLR cameras in general have a built in interval timer where you can set the time interval and the number of shots the camera will take.
1. From your camera’s menu screen, select “Interval timer”. This is normally found in the camera settings menu page. Our Canon menu is pictured here:

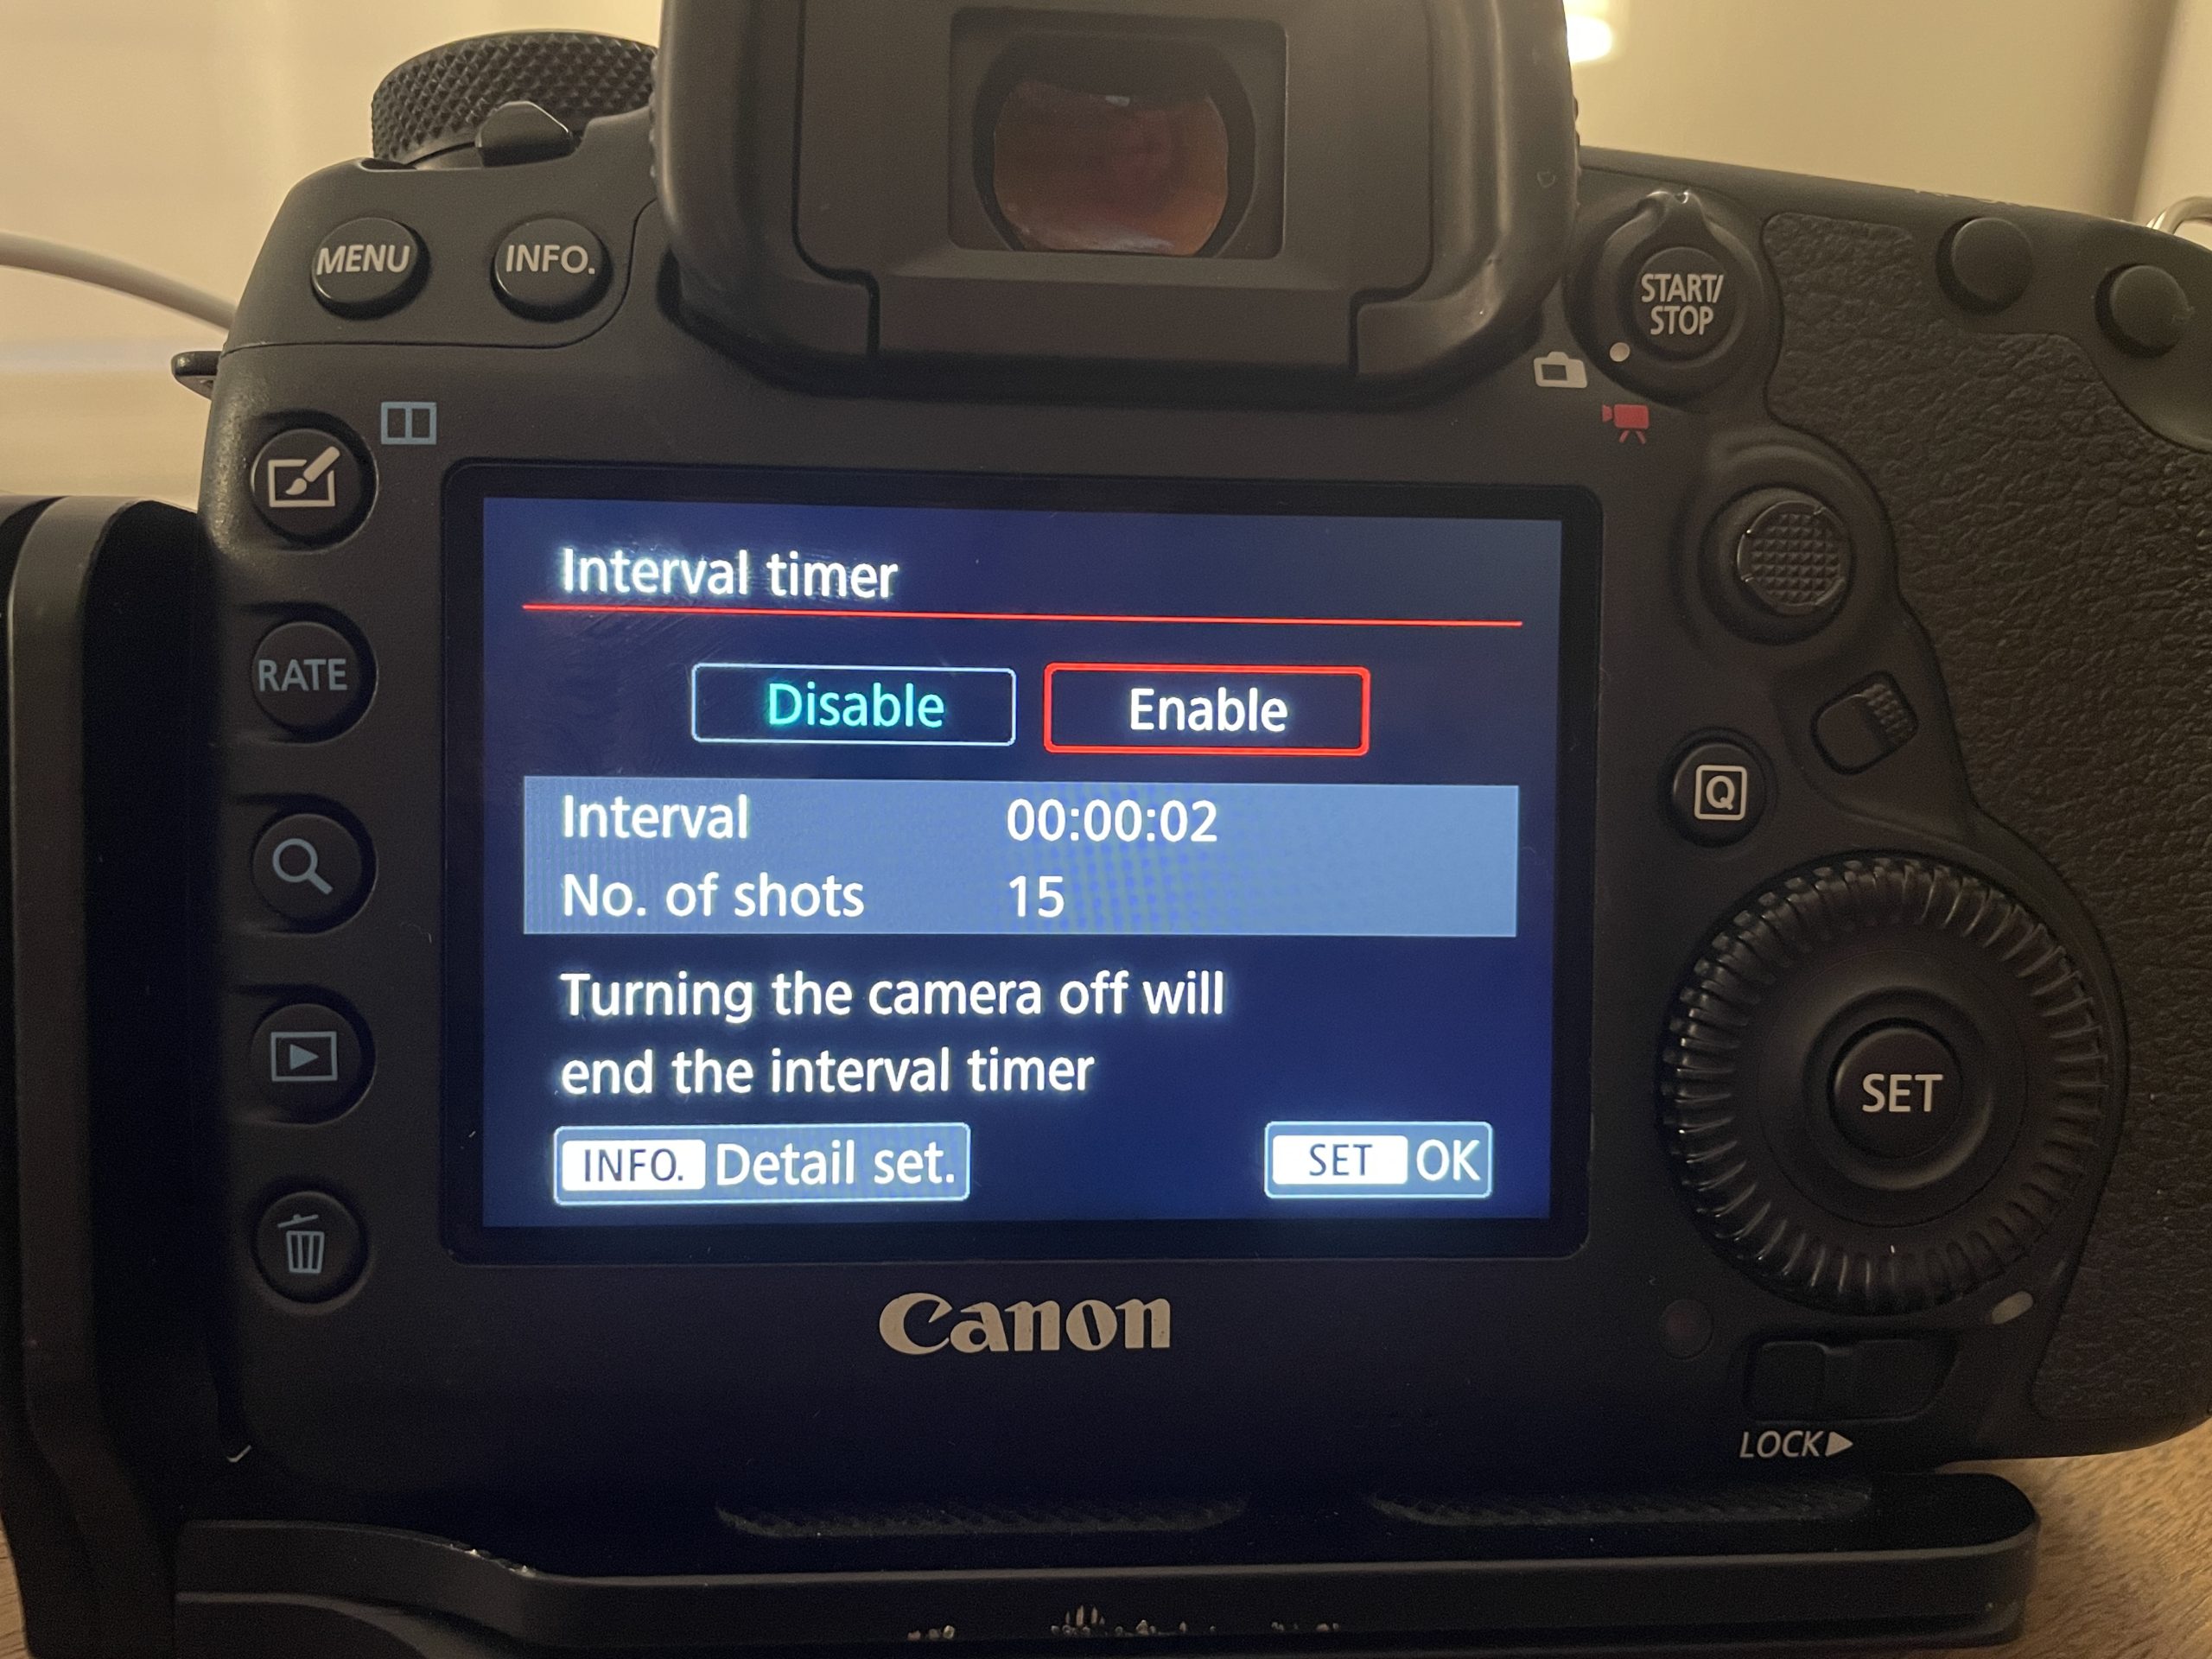
2. Once you select the interval timer, select “Enable”. This will bring up the option to select a time interval and the number of shots to be taken. You can change the interval and number of shots by selecting “info.Detail set.”
3. Once you have set your interval settings, click “OK”. Your camera is now ready for self-timer shooting. If you wish to stop the camera from taking photos in the middle of an interval, just turn your camera off, and it will record the images already taken.

*The interval timer must be enabled for every set of photos. After one interval is completed, the interval timer will disable.*
It is almost as simple as that! However, Canon has created an app that allows you to see EXACTLY what your camera sees. Through the app, you are even able to select a focal point and remotely press the shutter button. This app is a game changer and significantly reduces the time spent trying to get the perfect shot. Here’s how it’s done:
- Before you are ready to shoot self-portraits, you will want to have the Canon Camera Connect App installed on your device. Once it is installed, you’ll want to make sure it is connected to your camera. From your camera’s menu screen, locate the configuration menu indicated by a picture of a wrench. Select Wi-Fi or Bluetooth depending on your camera.
- Communication settings >Built in wireless settings > Wi-Fi/NFC or Bluetooth
- Select Enable >OK The camera will then prompt you to enter a nickname for your camera. This makes your camera recognizable in the app., as you connect it.
- Select Wi-Fi function >Connect to smartphone > Easy Connection. Your camera will have its own Wi-Fi connection. In your phone’s Wi-Fi settings, select the camera’s Wi-Fi.
- Once your phone is connected to your camera, you are ready to start shooting! Open the Canon Camera Connect App and select “Remote live view shooting”. From here, you are able to see your camera’s view and easily select a focal point, and begin remotely shooting.
Read More: The One Tool That Completely Changed Our Photos
A Few Other Tips…
–Make sure your aperture is set between 2.8 and 3.5 for sharper images.
-We typically use a portrait lens for self-portraits. We love our Canon 50mm f/1.4.
–Make sure the head of the tripod is tightened once the camera is attached.
–Always be aware of your surroundings when shooting.
–Do your research on a location before setting up a tripod. Some places, Washington D.C. for example, require photography permits for any tripod shooting.
Read More: Our Editing Process
Enjoy the beautiful memories you have captured!


[…] did an entire blog post on taking better self portraits on vacation which you can read here, but we have to mention our tripod and portrait attachment again. We are more introverted people, […]
[…] If you would like to read more about how we take our travel photos, check out our earlier post here. We also have a post that goes over our favorite camera gear that you can find here. We always […]
[…] Read More: How to Take Better Travel Photos […]